Tutoriale Online

Tutoriale Online Invata Online cum se face si cum este corect. Learn Online How Must To Do !

Archive for the ‘Installation Guide’ Category

Windows 7 Tutoriale Control Panel

Posted by ascultradio on November 12, 2009

The Control Panel – Switching Between the Classic & Category View :


The Control Panel from Windows is the place where you can find all important system settings. Therefore it has been tweaked with each version of Windows and Windows 7 makes no exception to this rule. The new version packs lots of usability improvements which help people find & change settings much faster. Even so, there are always people who will prefer the older versions. That’s why, in this article, I will compare the new Control Panel with the one from Windows XP & 2000. I will also show how to switch between the classic view and the new default view, so that you can find your way faster.

The Control Panel Comparison: Windows XP vs Windows 7

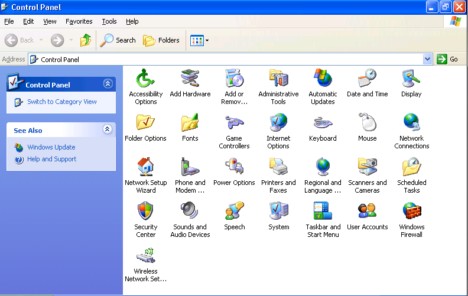
The classic view of the Control Panel from Windows XP & 2000 is split into a long list of configuration items. Since the search option is absent, finding the option you need might prove to be slightly tricky.

cpc1

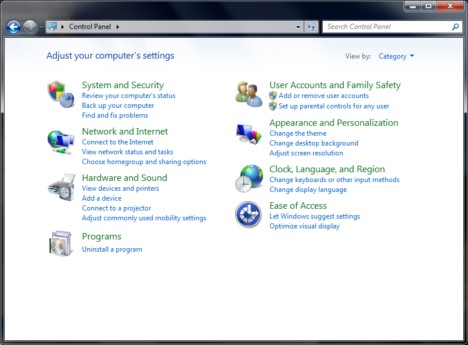
The Control Panel from Windows 7 improves on the changes introduced by Windows Vista. You have eight main tasks categories to choose from and you can easily search for an item by using the Control Panel search box.

cpc2

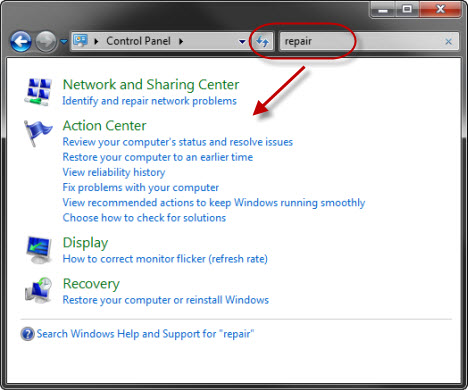
Clicking on a category will open a list with sub-categories and the main configuration items. When you open a sub-category you can reach all configuration items available for it. For efficiency purposes, simply use the search box located in the upper-right side of the Control Panel.

cpc3

This speeds up the process of finding the configuration item you want and, after using it a few times, you will become addicted to it and find the Windows XP Control Panel to be quite inflexible and difficult to use.

How to Switch Between the Windows XP & Windows 7 Views

Open the Start Menu and click on Control Panel. On the right side of the window there is a ’View by’ field with several values available for selection. Click on the arrow near it and select the way you want to view your Control Panel items.

cpc4

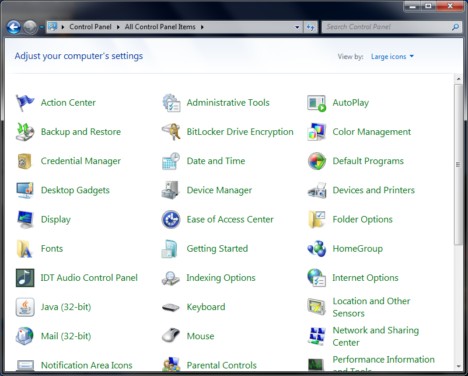
Selecting ‘Large icons’ or ‘Small icons’ is the equivalent of the classic Control Panel view from Windows XP. The difference between these options is only the size of the icons shown. Category is the default option in Windows 7 and it means having all items split by categories.

cpc5

If you want to go for the classic view from Windows XP, all you have to do is use the Search Box located in upper-right corner of the window. It will help you find items much faster than scrolling through long lists of shortcuts.

cpc6


Done !

Posted in Control Panel, Installation Guide, Tutoriale Windows 7, Tutoriale Windows XP | Tagged: , , , , | 1 Comment »

Tutoriale Windows XP Installation Guide

Posted by ascultradio on November 11, 2009

Windows XP Mode Prerequisites & Installation Guide :

Windows XP Mode or XPM is a very useful feature which allows Windows 7 users to run a pre-configured virtual machine with a licensed copy of Windows XP Service Pack 3. This allows users to run old applications in Windows XP mode directly from Windows 7 therefore eliminating the need to have both operating systems installed. This feature helps eliminate many issues, especially in corporate networks which use a lot of old software. In this article I will show the following: when is Windows XP Mode useful, which are the prerequisites for installing it, how to install it and how to configure its installation.

Do I Need Windows XP Mode?

Windows XP Mode was developed mainly for businesses which use old applications that are not compatible with Windows 7. This tool will help them install and run these applications directly from Windows 7. For home users this feature will be necessary only if you have really old software which runs only on old versions of Windows.

Another possible use is to run very old games in Windows XP Mode, games which don’t need full hardware acceleration. A good example of this are many old DOS games. Newer ones which make use of more advance hardware acceleration features will not function in Windows XP Mode.

What Do I Need to Install Windows XP Mode?

Windows XP Mode is only available for Windows 7 Enterprise, Windows 7 Professional, and Windows 7 Ultimate users. It works only if you have previously installed Windows Virtual PC and it shares the same hardware requirements. Windows XP mode is basically an image of Windows XP Service Pack 3 pre-configured to work in Windows Virtual PC.

How to Install Windows XP Mode

The first step is to go to the Windows XP Mode download page. Scroll down until you see ‘Step 1 – Select the appropriate installation’. Select from the drop-down menus the Windows 7 version that you have installed on your system and the language that you prefer.

xpm1

Then click on the ‘Download Windows XP Mode’ button.

xpm2

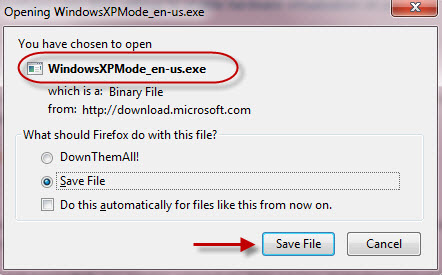
The setup file of Windows XP Mode will pop-up. Depending on the browser you use, click on the Save File or Save button to download the file. The file has approximately 460 MB and, depending on your internet connection, it will take a while for you to download it.

xpm3

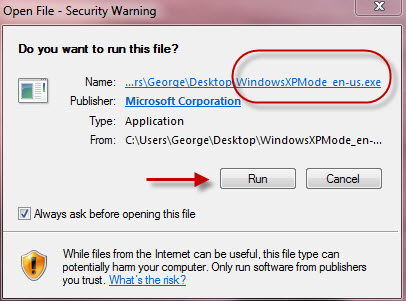
After the download finishes, double click on the file. Click on the Run button if a Security Warning window pops-up.

xpm4

Now the setup will extract the files needed for the installation of Windows XP Mode.

xpm5

Once done, the setup window of Windows XP Mode will pop-up. Click on Next.

xpm6

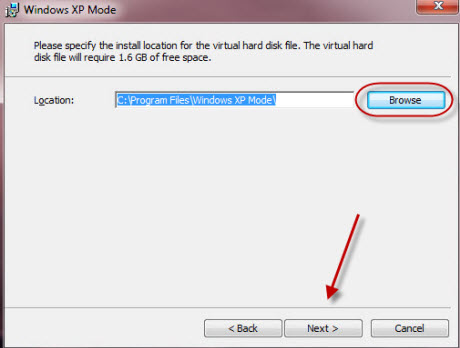
Click on Browse to select a different location than the default one for the Windows XP Mode application and click on Next.

xpm7

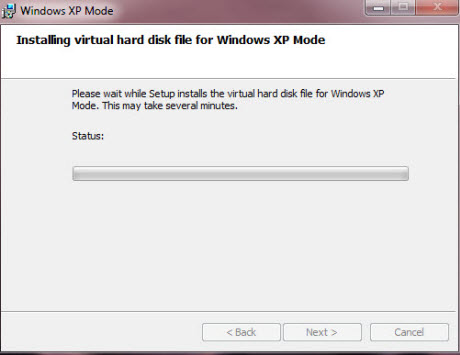
Now wait a few minutes until the installation finishes.

xpm8

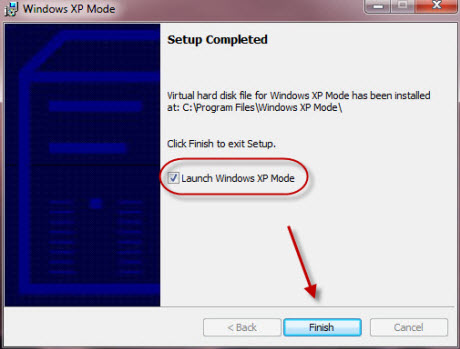
Click on Finish to end the installation procedure and launch the Windows XP Mode. If you don’t want to launch Windows XP Mode at this time, deselect the Launch Windows XP Mode option and then click on Finish.

xpm9

How to Configure the Windows XP Mode Setup

When you launch it for the first time, you have to wait for the Window XP virtual operating system to configure itself for a few minutes. The first window that will open is the ‘License Agreement’. Read it, check the ‘I accept the license terms’ box and then click on Next.

xpm10

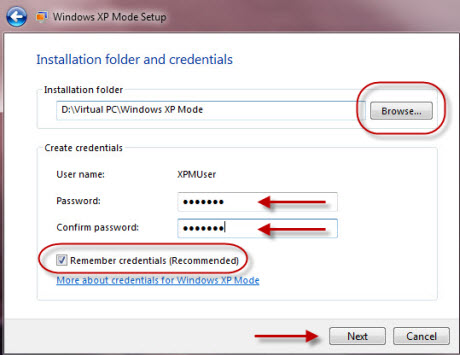
Click on Browse to install Windows XP Mode in a different place than the default one, then type and confirm a password, check the ‘Remember credentials’ option so that you won’t have to type in the password each time you open Windows XP Mode and click on Next.

xpm11

Next you will have to decide if you want Automatic Updates ON or OFF and then launch the setup by clicking the ‘Start Setup’ button.

xpm12

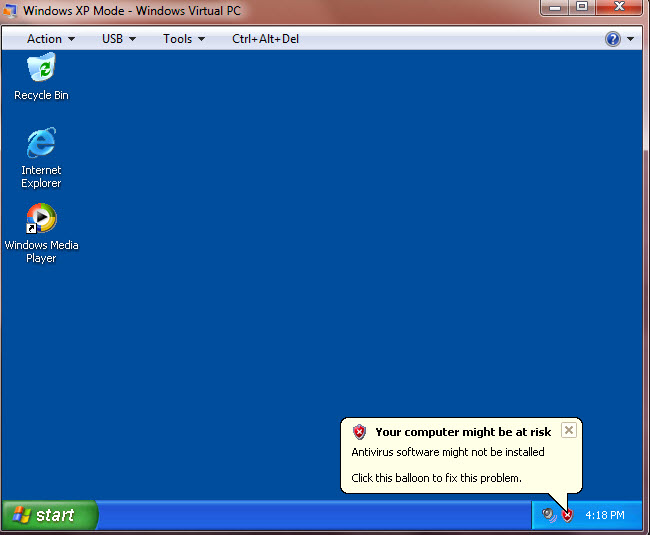
Now wait a few minutes until Windows XP is being setup. When done, Windows XP will pop-up in a new window.

xpm13

That’s it, now you have Windows XP Mode installed. You can find it in Start Menu – All Programs – Windows Virtual PC – Windows XP Mode or you can search for ‘xp mode’ in the Start Menu’s search box.

xpm14

Done !

Posted in Installation Guide, Tutoriale Windows XP | Tagged: , , , | 1 Comment »